
esp8266打造女友小礼物
异地恋+女友考研ing,想给女友一个随时随地都能想起我的小礼物。女友喜欢花花,也喜欢折花,于是有了灵感基础,想打造两盆互通的花花,每次起风都代表我的思念。
思路为搭建一个BS架构,用一个web应用控制两边的交互,一边花花的震动模块接受到震动感应,随即携带open参数请求url,另一边的花花则每秒请求一次url,如果为open,则打开风扇,这样就实现了两边的花花能同时吹动。
材料
单盆花花材料如下:
- esp8266—12块钱
- 塑料万象盆—3块钱(可惜基本不单卖)
- 震动模块—2块钱
- 风扇模块—6块钱
- 铜丝+花匀下来—6块钱
一盆的造价大概30块钱左右(自行算上microusb线,杜邦线和手工工具咯),价格还算美丽,不过最重要的还是让她感受到自己亲手做的情意咯。
编程
服务端
几行php代码即可,web应用接受get参数来获取花花的状态,并用一个文件存储现在的状态,当有花花请求现在的状态时则把文件中的状态打印出来,这样两盆花花就能同步状态了。
<?php
	$status = $_GET['status'];
	$filename = "flower.conf";
	if($status=="open"){
		$conf = fopen($filename,"w+");
		fwrite($conf,"open");
		fclose($conf);
		}
	elseif($status=="close"){
		$conf = fopen($filename,"w+");
		fwrite($conf,"close");
		fclose($conf);
		}
	elseif($status=="query") {
		$conf = fopen($filename,"r");
    		$content = fread($conf, filesize($filename));
    		echo($content);
		}
?>
esp8266
使用WiFiManager库完成esp8266的自动配网,非常方便使用。连上网后考虑交互流程,为了避免风扇转动引起震动导致两边风扇永续转动,先将感应震动与控制风扇分开
感应震动过程为:一盆花花接受到震动,发送open给服务端,过3秒更新状态为close并发送给服务端
控制风扇过程为:未感应到震动,则请求服务端。若为open则打开风扇,并在3秒后关闭风扇发送close给服务端;若为close则进入下一次循环。
这样完成了整个过程,代码如下:
#include <Ticker.h>
#include <ESP8266WiFi.h>
#include <ESP8266HTTPClient.h>
#include <DNSServer.h>
#include <ESP8266WebServer.h>
#include <WiFiManager.h>
#include <WiFiClient.h>
#include <Arduino.h>
#define OPEN_URL "http://xxx.xxx.xxx.xxx/flower.php?status=open"
#define CLOSE_URL "http://xxx.xxx.xxx.xxx/flower.php?status=close"
#define QUERY_URL "http://xxx.xxx.xxx.xxx/flower.php?status=query"

Ticker ticker;
int count;

void setup() {
  Serial.begin(115200);
  Serial.println("/*****开始驱动*****/");
  WiFiManager wifiManager;
  wifiManager.autoConnect("Gardenia jasminoides");
  Serial.println("");
  Serial.print("ESP8266 Connected to ");
  Serial.println(WiFi.SSID());
  Serial.print("IP address:\t");
  Serial.println(WiFi.localIP());
  pinMode(D1,OUTPUT);
  ticker.attach(1, tickerCount);
}

void loop() {
    if (digitalRead(D2))
    {//未震动
      if (count >=1)
      {
        count=0;
        String fan_mode = QueryRequest();
        if (fan_mode == "close")
        {//风扇未启动
          digitalWrite(D1, LOW);
        }
        else if (fan_mode == "open")
        {
          Serial.println("start fan");
          digitalWrite(D1, HIGH);//启动风扇
          //analogWrite(D1, 1000);
          delay(2500);
          CloseRequest();
          delay(1000);
        }
      }
    }
    else
    {
      Serial.println("detect shock,sending open request");//震动
      OpenRequest();
      delay(3000);
      CloseRequest();
    }
}

void tickerCount(){
  count++;
}

String OpenRequest(){
  HTTPClient httpClient;
  WiFiClient client;
  httpClient.begin(client,OPEN_URL);
  int httpCode = httpClient.GET();
  Serial.print("Send GET request to URL: ");
  Serial.println(OPEN_URL);
  if (httpCode == HTTP_CODE_OK) {
    String responsePayload = httpClient.getString();
    Serial.println("Server Response Payload: ");
    Serial.println(responsePayload);
    httpClient.end();
    return responsePayload;
  } else {
    Serial.printf("[HTTP] Requests failed, error: %s\n", httpClient.errorToString(httpCode).c_str());
    httpClient.end();
    return "failed";
  }
}
String CloseRequest(){
  HTTPClient httpClient;
  WiFiClient client;
  httpClient.begin(client,CLOSE_URL);
  int httpCode = httpClient.GET();
  Serial.print("Send GET request to URL: ");
  Serial.println(CLOSE_URL);
  if (httpCode == HTTP_CODE_OK) {
    String responsePayload = httpClient.getString();
    Serial.println("Server Response Payload: ");
    Serial.println(responsePayload);
    httpClient.end();
    return responsePayload;
  } else {
    Serial.printf("[HTTP] Requests failed, error: %s\n", httpClient.errorToString(httpCode).c_str());
    httpClient.end();
    return "failed";
  }
}
String QueryRequest(){
  HTTPClient httpClient;
  WiFiClient client;
  httpClient.begin(client,QUERY_URL);
  int httpCode = httpClient.GET();
  Serial.print("Send GET request to URL: ");
  Serial.println(QUERY_URL);
  if (httpCode == HTTP_CODE_OK) {
    String responsePayload = httpClient.getString();
    Serial.println("Server Response Payload: ");
    Serial.println(responsePayload);
    httpClient.end();
    return responsePayload;
  } else {
    Serial.printf("[HTTP] Requests failed, error: %s\n", httpClient.errorToString(httpCode).c_str());
    httpClient.end();
    return "failed";
  }
}
组装
按照上述代码的话esp8266的d1用于控制风扇,d2用于震动,再各自分别连好vcc和gnd,将花用细铜丝+粘胶固定在震动模块的顶端(铜丝最好细一点0.2mm-0.3mm,花也最好折小一点,风扇模块的风力并没有那么大),然后组装到一起,就可以了
组装完如图:
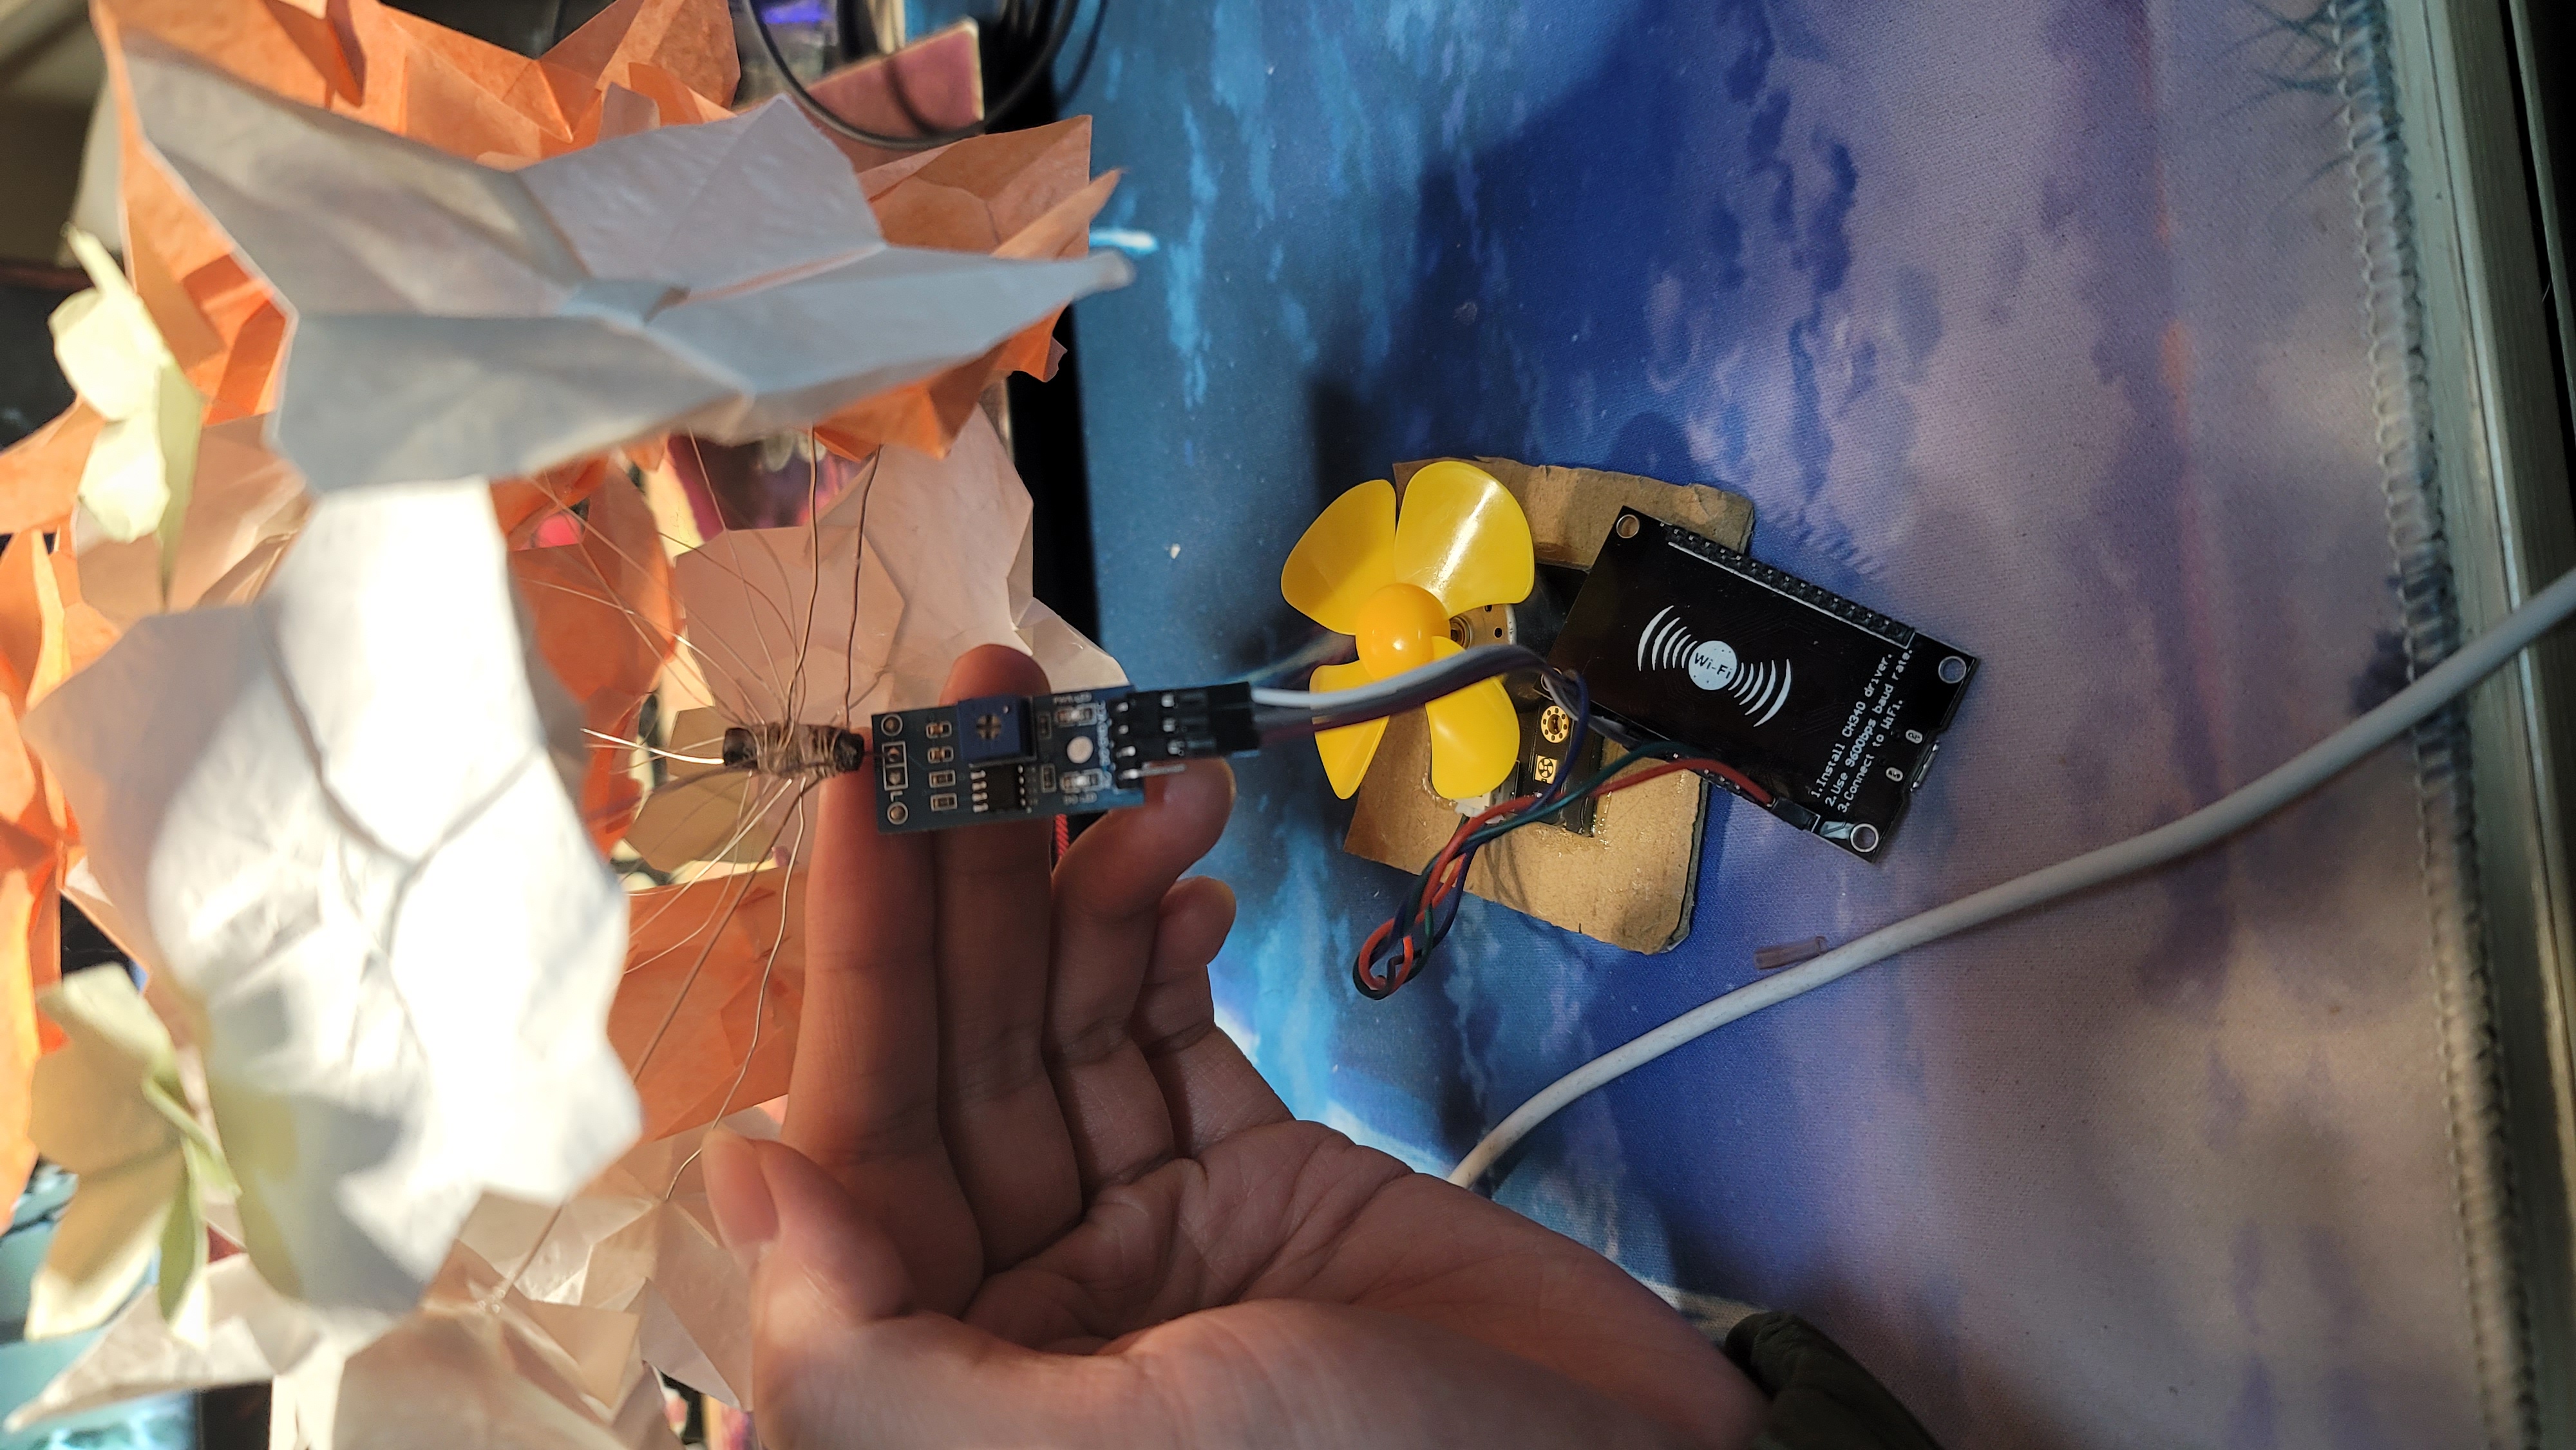
最后放进万象盆里,塑料盆底部开口将线迁出,就完成了。
